
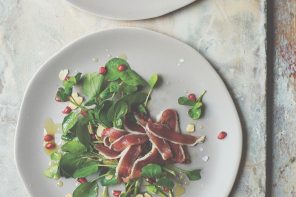
I’ve just made my first batch of cheese and am feeling quite chuffed with myself. An invitation to try out a Mad Millie kit saw me produce what I think was a particularly good ricotta. Later in the post I’m going to tell you how you can win a kit so you can try it out for yourself.
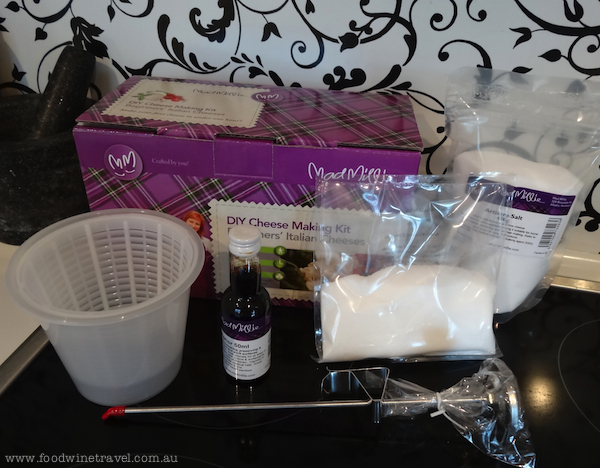
In the meantime, let me tell you about my experience. It really is dead easy. Millie takes all the hassle out of making delicious ricotta (as well as plenty of other great products). She packages it all up nicely in a bright purple box, complete with easy to follow recipes and all the equipment you need. You will have to supply the milk though.
The Italian kit comes with accessories to make a few different cheeses, including mascarpone, mozzarella, ricotta and traditional Italian-style ricotta.
After looking through the recipes in the kit, I figured ricotta would be the easiest way to gently begin my cheesemaking career. I also thought it would be great with some banana bread and honey that I had on hand.
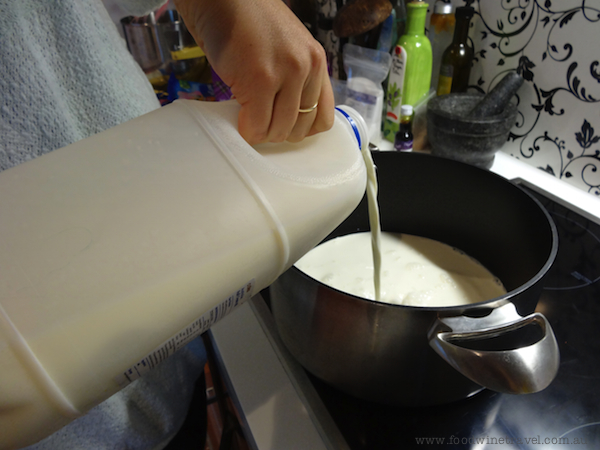
So off I went and bought two litres of milk as required. Then, I poured it into the biggest saucepan I had. The recipe advises to disinfect all the equipment you’re using. Normally I’d recommend this but my pot was clean, I had only just taken the equipment from the box, and I was planning to use the ricotta almost immediately. So I didn’t bother disinfecting.
I didn’t run into any problems as a result but I will definitely disinfect the equipment next time I use it. (On a side note, I also had a lot of trouble opening the cap on the disinfecting agent that comes in the pack, and it didn’t take me long to give up!)
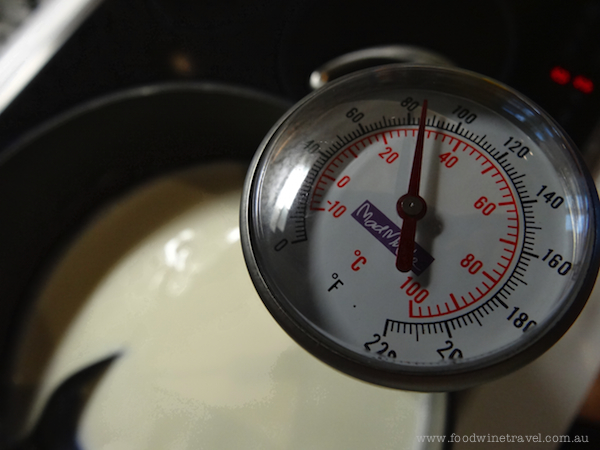
With my pot filled with dairy goodness, I popped in the thermometer and then… waited. For quite a while actually. The recipe says to continue stirring the milk as you wait for it to reach 95 degrees Celsius. This took a lot longer than I expected. I would recommend that you have everything ready before turning the stove on – the mould for the cheese, as well as the cup of citric acid and water mix, so you have it ready to stir in.
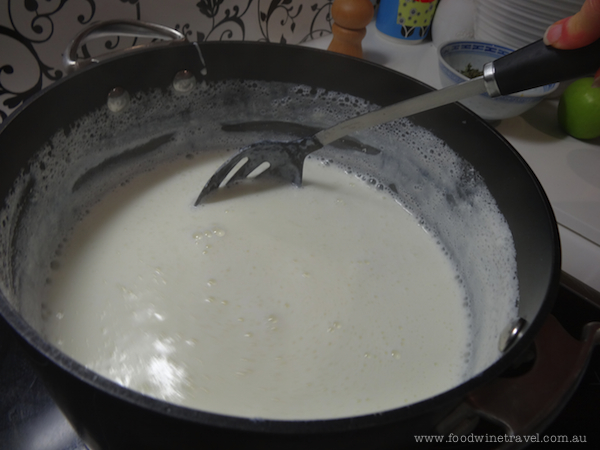
Oh, and you also have to add some of the cheese salt that comes with the pack, before you heat the milk. Cheese salt is special salt that isn’t iodised, so as to not disrupt the chemicals in the milk.
After stirring for about 10 minutes, being careful your milk mixture does not catch or burn, it should be nearing the right temperature. Take it off the heat once it reaches 95 degrees Celsius, and throw in the citric acid mixture.
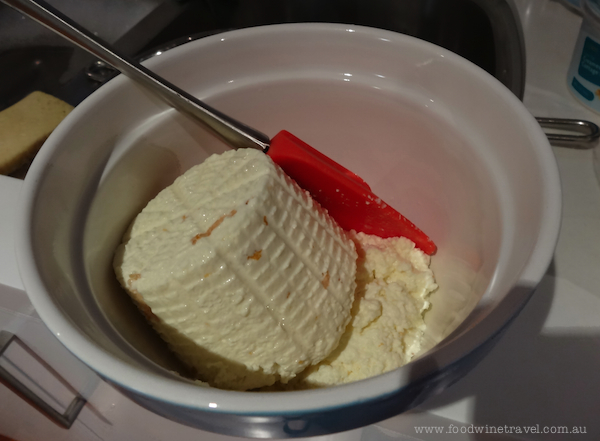
After stirring your heart out, this is where it all pays off. When the mixture starts curdling, everything happens very quickly. It sounds unappetising, but it was actually incredibly gratifying. It was great seeing it come together before my eyes!
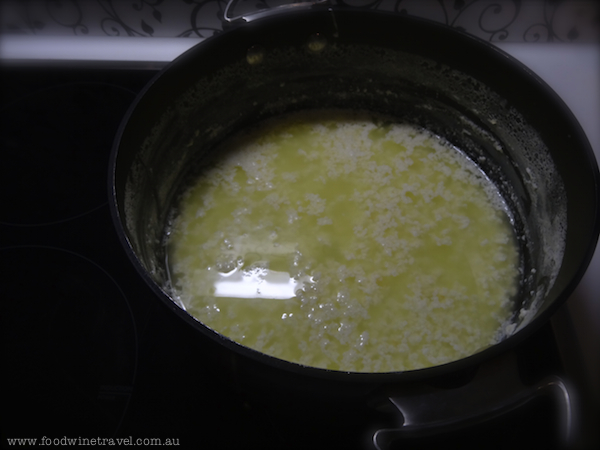
Once it’s all lumpy, let it cool. Take a load off, you’ve done all the hard work now. Boil the jug and relax.
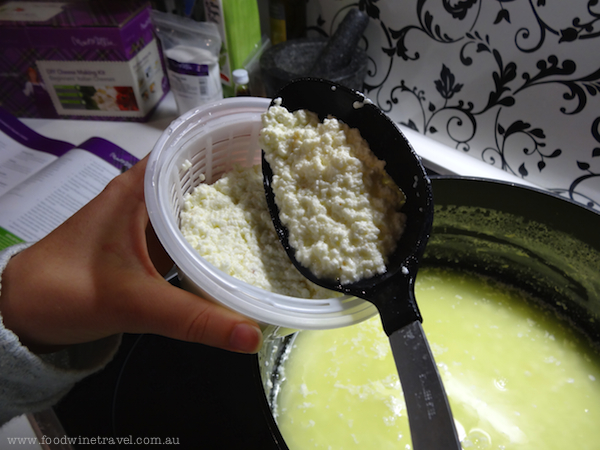
Thirty minutes later – scoop the clumps from the saucepan and put them in the mould provided. Squish them all in, as much as you can possibly fit. I had a bit left over, so I used a sieve to dry it off as much as possible, then I put it in another container.
Now, while I did enjoy a big dollop of the gorgeous ricotta on my banana bread, I was on a roll. A family dinner that night prompted me to rethink my ricotta motives. All it took was a 5 minute browse of my all time favourite – Pinterest (obsessed!) – and I had all the inspiration I needed.
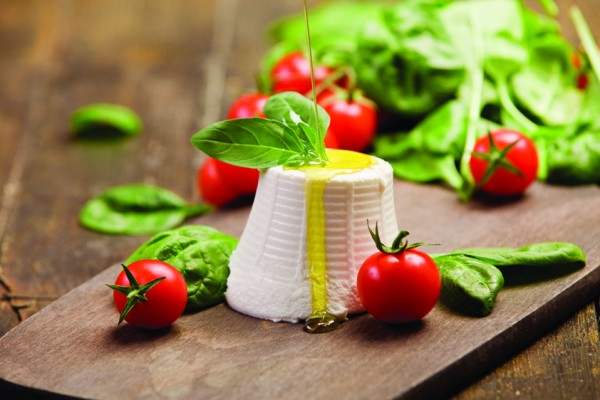
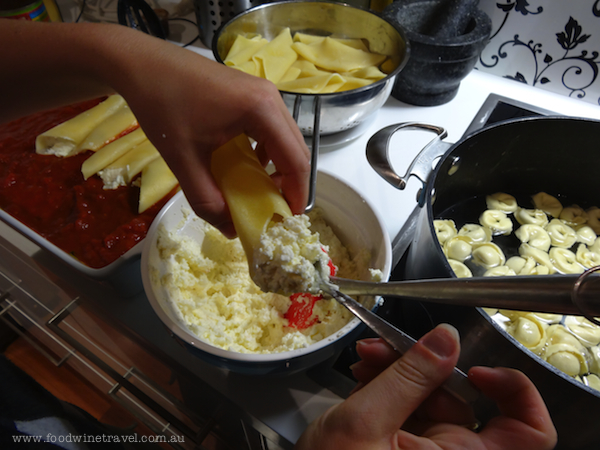
I came up with this very simple recipe using a jar of tomato pasta sauce, a can of diced tomatoes and basil from our garden. If you have time, homemade tomato sauce is always worth the effort.
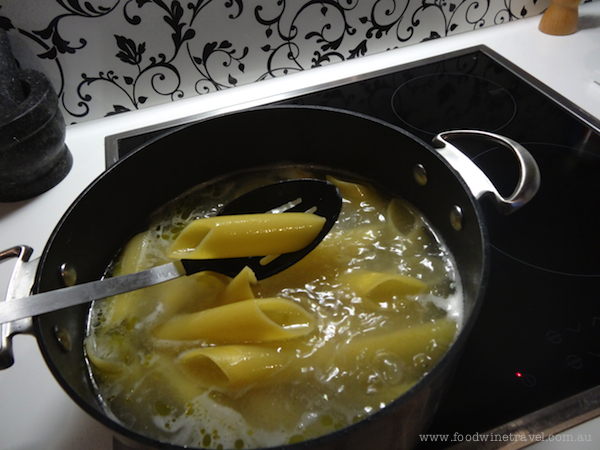
For the filling, mix all the ingredients together and stuff into the biggest pre-cooked pasta shells or tubes you can find – look at your local deli, they’re more likely to have pasta of this kind. Once filled, throw them in the dish on top of the sauce.

RICOTTA STUFFED PASTA WITH TOMATO SAUCE AND BASIL
Jar of store-bought tomato sauce (feel free to replace with homemade – in fact I encourage you)
Can of diced tomatoes
1/2 cup grated parmesan cheese
 1/2 cup grated cheddar cheese
Fresh basil
Large pasta shells or tubes
For the filling:
1 egg
1 tablespoon cottage cheese
2 cups homemade ricotta*
1 cup grated cheese of your choice (such as parmesan, manchego or pecorino)
Salt and Pepper to taste
Pre-heat oven to 190 degrees C. Put tomato sauce and diced tomatoes in a large baking dish.
Mix ingredients together for filling. Cook pasta until al dente.
Once the pasta has cooled, stuff with ricotta filling.
Arrange the ricotta-filled pasta in the baking dish on top of the tomato mixture.
Top with grated cheese and fresh basil.
Bake for 15 minutes or until brown on top.
Serve with crusty bread and good quality olive oil.
*Refrigerate ricotta overnight before using.
* Mad Millie’s Beginnerʼs Italian Kit ($39.90) makes mozzarella, ricotta, ricotta salata and mascarpone. Other products in the Mad Millie range include Artisanʼs One Day Cheese Kit, Fresh Cheese Complete Kit, Hard Cheese Kit, Specialty Cheese Kit, Probiotic Yoghurt Kit, and sausage and preserving kits. More information: www.madmillie.com.au
Win!!! Click here to win a Mad Millie Beginnerʼs Italian Kit.
Cannelloni is my favourite pasta dish and with homemade ricotta? wow. I’ve only ever made ricotta and feta but I’m getting pretty good at it. 🙂 Yours is gorgeous.
I made my first ricotta at home last year out of sheer necessity. I’d been diagnosed lactose intolerant and was devastated to find out what dishes I had to overlook now to avoid lactose. Then I discovered lactose free milk and the simplicity of at home ricotta. I’ve never looked back. It’s so satisfying isn’t it?
Hi Helen, That’s great that you’ve been able to find a solution to your lactose problem. Great that you can still enjoy your cheese!
Nothing quite like home made is there?! Your ricotta looks wonderful!
I thought you might be interested to know that what you’ve made is actually cacioricotta, which means ‘ricotta cheese’. It’s made in southern Italy by a hybrid method between cheese and true ricotta, and it’s usually made using sheep or goat milk. Since I live in northern Tuscany near Lucca, I’ve never seen cacioricotta being made. On my slow foodie tours I take clients to see true ricotta being made. You have to make cheese first by heating milk to 38C and adding rennet to coagulate the milk proteins to form curd. You remove the curds from the yellow liquid which is the whey — remember Little Miss Muffet? Put the curds in a mould and press out the liquid which is whey. Add it to the whey in the pot and reheat the whey, as you describe above. ‘Ricotta’ means ‘recooked’; you heat it once to make the cheese and then again to make the ricotta. As the whey gets up to 90 to 95C, white strands start to float to the surface. This is the ricotta. It’s denatured albumin, like the white of egg which also turns from yellow to white when you heat it. Skim off the white strands and put them in the ricotta mould. Don’t press. Just let the liquid run out and eat the ricotta very fresh. This true ricotta contains virtually no fat or lactose — they all went into the cheese curd. This is really just for information, because the big drawback to making true ricotta at home is that you need to start with about 12 to 15 litres of milk to end up with a decent amount of ricotta.
Great article, Alise, and the ricotta was fabulous!
That’s so funny that this week you have been making making ricotta – seriously gorgeous looking ricotta as that – and I have been making paneer 😀 Beautifully simple pasta dish to highlight it too. Lovely, Christine
Or should I say, Alise!
Hi Christine. I thought you would need to use unhomogonised milk?
From John Fairley
No, John, it worked beautifully with standard shop-bought milk.